Services

Home / Services

Efficient API Plant Piping Work: Quality Installation and Maintenance

Our API plant piping work is designed to meet the highest industry standards for quality and safety. We use the latest technology and equipment to ensure that our piping work is of the highest quality. Our team of experienced engineers and technicians will work with you to design and install piping systems that are customized to your specific needs. We take pride in being a trusted name in the industry and strive to provide you with the best possible service. Our API plant piping work is suitable for a variety of industries and applications, including pharmaceuticals, chemicals, and oil & gas.

Safe and Reliable IBR Piping Work: Quality and Installation

Our IBR piping work is designed to meet the Indian Boiler Regulations (IBR) standards for safety and quality. We understand the importance of compliance and safety when it comes to piping work, and that’s why we ensure that our IBR piping work is of the highest quality. Our team of experienced engineers and technicians will work with you to design and install piping systems that meet the IBR standards. We take pride in being a trusted name in the industry and strive to provide you with the best possible service. Our IBR piping work is suitable for a variety of industries and applications, including power plants, chemical plants, and petrochemical plants.


Precision and Efficiency in Every Weld - Experience Orbital Welding Work

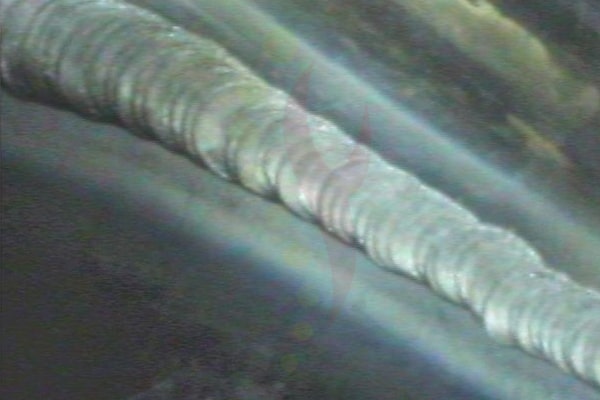
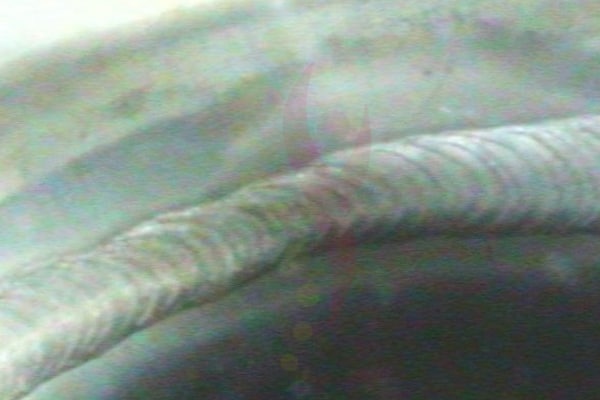
Our orbital welding work is designed to meet the highest industry standards for quality and precision. We use the latest technology and equipment to ensure that our welding work is of the highest quality. Our team of experienced welders and technicians will work with you to design and install welding systems that are customized to your specific needs. We take pride in being a trusted name in the industry and strive to provide you with the best possible service. Our orbital welding work is suitable for a variety of industries and applications, including pharmaceuticals, food processing, and semiconductor manufacturing. With our orbital welding work, you can be sure that your welding needs are met with the highest level of precision and accuracy.

  1. Purpose :Define the process of welding for autogenously weld joint of tubular products.
  2. Scope :This procedure applies to the welders working at Fayme Engineering Pvt. Ltd. for welding of tubing used in contact with pharmaceutical products.
  3. Equipments :
    • Orbital welding machine
    • Fixtures and Dies.
    • Argon gas (High Purity of 99.99%)
    • Filters
  4. Procedure :
    1. Machine Setup:
      • Place the orbital welding machine on plane surface and make the internal connections between machine, Welding head and printer (if not inbuilt printer).
      • Connect the main power cable of orbital welding machine to the nearest power point with sufficient current carrying capacity as mentioned on welding machine.
      • Identify the size of tubes to be weld and fix the appropriate die in welding head of orbital welding machine.
      • Switch on the main power of orbital welding machine and feed the required data of tube size and thickness. The orbital welding machine automatically selects the following weld parameters.
        • Duration of pre – purge with argon gas.
        • Duration of Post – purge with argon gas.
        • Strike current for initialization of arc.
        • Peak current and base current at each level.
        • Motor RPM.
    2. Welding procedure:
      • Cut pipe pieces as per the measured length.
      • Make face of Tube right angle to its axis by grinding and polish to smooth surface. Clean the internal and external surface near ends.
      • Plug both ends of Tube with the help of welding dams.
      • Align both faces of Tube and do tacking at three locations along the face at 120 deg angle, using TIG welding machine without filler wire.
      • The pure Argon gas flow rate for shielding during tacking process is maintained at approx 15 L/min with the help of gas flow regulator installed on argon cylinder.
      • For orbital welding install the tack welded joint inside machine clamp head. Check the alignment of tungsten head by manually rotating around the joint. Keep the gap between tungsten head and weld joint 1.6 to 2.0 mm.
      • Prepare the Sample weld joint on piece of same pipe, prior to make the welding joint on main length of piping.
      • Plug both end of the tube and start argon gas purging to joint at 10-12 L/min and to the machine at 12-15 L/Min for shielding. Maintain gas flow through joint till post – purge time.
      • Start orbital welding machine.
      • After completion of welding post – purge time and subsequent cooling, remove the joint from the orbital head and check the joint visually.
      • If Sample welding joint is not proper, make the required changes to the motor speed and current and repeat the procedure for sample welding joint.
      • Clean the external surface of weld joint with buffing pad till external surface finish is satisfactory. Check the welding joint quality and record the observation in welding joint report (FE/SOP/OW/F1).
      • Keep the sample along with welding coupon printout at site.
      • Keep the weld parameters unchanged and repeat the above welding procedure for each welding joint of main piping length.
      • Repeat the sample weld joint procedure every day at start of the day.
      • All Welding joints shall be engraved / marked with identification number and report to be prepared.
  5. Formats :
    • Welding Joint Inspection Report (FE/SOP/OW/F1)
    • Welding Coupon printout (As printed by orbital welding machine)

Riboflavin testing

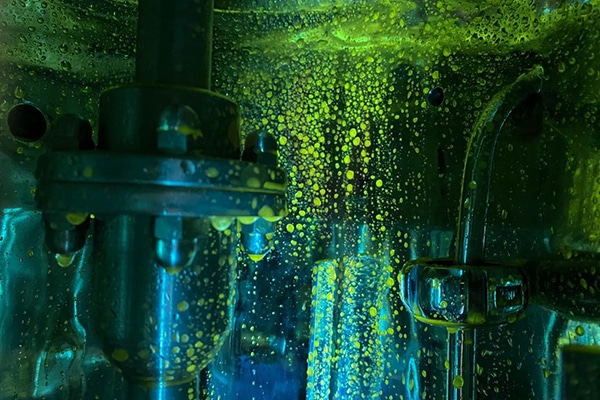
Riboflavin is, a type of vitamin B found in food, is selected for vessel coverage studies due to its fluorescent properties under ultraviolet light and Riboflavin coverage test is use for determine the coverage of spray ball which is use for Clean-in-place (CIP) systems are used in the pharmaceutical industry to clean one or more vessels in the manufacturing process. Spray Balls are internally installed in vessels to ensure the CIP system can properly clean all areas of the tank. During the cleaning cycle, Spray Balls disperse cleaning solution and provide physical action to remove residues inside equipment. Spray Balls must deliver adequate tank coverage for a complete clean.
UTILITY PENDANT

Boroscopy

  1. Purpose : The purpose is of this work instruction is to ensure that the boroscope examination is done correctly.
  2. Scope : The procedure covers the boroscope examination of autogenous 9weld made by fusion of base material without the addition of filler) weld joint of piping.
  3. Equipments : The remote visual inspection is carried out by video boroscope machine.
  4. Procedures :
    • The piping inspection spool shall be taken up for boroscopy examination only after completion of all earlier stages. i.e.
      1. Visual inspection of weld Visual seam from outside.
      2. Verification of engraved weld joint no.
      3. Orientation and dimension of the concern spool.
    • Install T.V. card in Laptop for visualization of image.
    • Then make arrangement to connect boroscopy machine with laptop.
    • The weld joint to be examined shall be made accessible for entry and movement of the fiber optic cable.
    • Synchronize the Visual display & the camera tips vision for clarity.
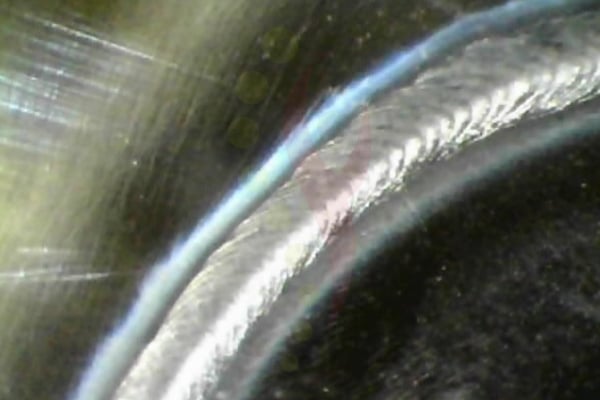
    • Articulate the camera tip all around the seam and inter relate the joint quality.
    • The image shall be saved with the identification of the Weld Joint No .in appropriate folder in laptop.
    • In case of rejection, the weld joint shall be marked with a specified procedure of rejection.
    • The rejected joint shall be rectified and reoffered for inspection.
    • The weld seam inspected by boroscopy examination shall check for…….
      1. Concavity on both sides of weld seam.
      2. Convexity on both side of weld seam.
      3. Mis-alignment.
      4. Lack of Penetration.
      5. Weld bead variation.
      6. Meander of seam.
PROCESS & UTILITY PIPING
LIQUID MANUFACTURING PLANT
HIGH PURITY WATER STORAGE SYSTEMS
PHARMA PROCESS VESSELS
  1. Procedures :
    • On satisfactory completion of the examination prepare “boroscope test report”.
    • The report shall include:
      1. Date of test,
      2. Test Method,
      3. Identification of component tested,
      4. Checked and approval signatory.
  2. Acceptance Criteria : Defects free welds.

Hydro Test

  • Purpose : The purpose of this work instruction is to establish a standard process for hydro-test of distribution piping.
  • Scope : This work instruction applicable to all types of distribution piping that requires hydro-test.
  • Equipments : Pressure Gauge. Hydro Pump.
  • Procedures : 
    1. First fill up the water in piping.
    2. Close the end connection by Tc liner/flange.
    3. Connect the hydro pump at start of piping side the adequate range of pressure gauge.
    4. Pressurize the line system up to 1.5 times of design pressure with help of hydro pump.
    5. Observe the pressure gauge reading after achieving the required pressure in the pipe.
    6. Hold this pressure for minimum 1hr.
    7. Observe for any pressure drop/leakage in the piping.
    8. If at all there is any leakage in the piping, rectify the same repeat the procedure.
    9. Release the pressure.
  • Acceptance Criteria :
    • No Leakage / No Pressure Drops.
  • Formats:
    • Hydro Test Report (FE/SOP/HT/F1)

Passivation

  • Purpose : Define the process for method of passivation.
  • Scope : This work procedure applies to all stainless steel products that require passivation.
  • Equipments : Required Accessories.
  • Safety Precation : Safety precautions shall be followed when working with potentially hazardous acids and chemicals in addition to maintaining adequate ventilation. Personal protective equipment shall be utilized to prevent injury and to minimize personnel exposure such personal protective equipment’s may include following.
    • Eye / Face shield protection.
    • Chemical residue gloves.
    • Butyl rubber apron or suit.
    • Rubber Boots.
    • Acid cartridge or supplied air respirators.

    Due to the potentially hazardous characteristics of spent acid & waste must be properly handled & disposed per federal and state regularly requirements. Any question concerning proper methods shall be addressed to the Safety Manager.

  • Procedure :
    1. Initial Flush : The System shall be flushed thoroughly using Purified/RO Water to remove any contamination, loose particles, corrosion product and any volatile corrosion inhibitors present.
    2. Passivation : Passivation is a chemical treatment of stainless steel with a mild oxidant (HNO3) for the purpose of enhancing the spontaneous formation of the protective passive film.
    3. Nitric acid concentration shall be used between 60 to 70%.
    4. Prepare the Nitric acid (HNO3) solution approximately between 5 to 10%.
    5. To prepare the nitric acid solution, calculate the piping length quantity and take water quantity minimum 1/3 capacity of tank if applicable (including piping length).
    6. Passivation to be carried out by filling and circulation of nitric acid (HNO3) Solution approximate 5 to 10% V/V for minimum1 hr. If Circulation is not possible in piping, then passivation carried out by soaking solution for minimum 1 hr. Check the pH of solution < 4.0 by using pH strip/pH meter and should be maintained < 4 pH throughout the circulation.
    7. Flushing : The system should be flushed with purified/RO water to remove acid from the system. Check the pH of outlet and inlet water & ensures both pH should equal.
  • Acceptance Criteria : pH of outlet water should be meeting against inlet/feed water & ensures both pH should be equal.

SURFACE ROUGHNESS TESTING WORK

RA VALUE TESTING WORK is the unit of Surface Testing Work

  • Scope : This purpose of this work instruction is to define the surface roughness.
  • Equipments : Surface Testing instrument. Other accessories.
  • Procedure:
    1. Take the job and clean it with the neat cotton cloth.
    2. Put the job in the Jig or fixture to get remain stable.
    3. Place the surface testing instrument and adjust instrument’s height as per the job work height.
    4. Power on the instrument.
    5. Start the testing
    6. After completing the test instrument generates result in the form of report.
    7. Take the print out of that result.
  • Acceptance Criteria : It is just a measuring instrument so acceptance criteria is as per the client’s requirement.

PNEUMATIC TEST

  • Scope : This procedure covers the pneumatic testing of piping.
  • Equipments : Pressure. gauge.Other accessories.
  • Test Medium : Test medium shall be required for this test is Compressed air or nitrogen.
  • Procedure:
    1. All User points valve shall be closed properly.
    2. All opening shall be blanked properly
    3. The pressure in the piping shall be gradually increased to specific test pressure (1.5 times the operating pressure).
    4. Observe the pressure gauge reading after achieving required pressure in piping. Hold this pressure for NLT 01 Hour
    5. Observe for any pressure drop / leakages in the piping
    6. If any pressure drop / leakages found than rectify the same and repeat procedure.
    7. If no any pressure drop / leakages found than release pressure gradually from piping.
  • Acceptance Criteria : No Any pressure drop /leakage found during Pneumatic test.

Passivation

Customized Pure Water Treatment Solutions
Product In Compliance Of Pharma copoeias
Heat Exchanger Manufacturer in India
Quality By Design
EDI System in Water Treatment Plant
Good Documentation Practices
Stainless Steel 316L Bend manufacturer
Compliance With Ispe
Water Purifier Spare Parts manufacturers
Good Engineering Practices
ss 316l seamless tee manufacturer
Real Time Data Logging

CUSTOM SOLUTIONS

Each unit designed and manufactured by Fayme Engineering Pvt. Ltd. is customized as per specific client requirements, site conditions and desired output quality. Custom solutions enables accurate address to the user requirements with optimum system design

AUTOMATION

HMI+PLC based fully automatic control panel is standard specification for most of the Fayme designed systems. SCADA integration can be enabled with minimum changes to the system based on customer requirement. Online data printing is a standard feature of all systems

SYSTEM OPTIMIZATION

Fayme Engineering Pvt. Ltd. has expertise in customizing the systems as per user specific requirements. This helps to remove the unnecessary clutters from the system. System optimization results in the efficient and effective operation during the whole life cycle.

Proposals are Welcome

Find out more about available solutions by contacting Fayme Engineering

Contact Us

Address 20/B, Second Floor, Karnavati Estate, NR.Trikampura Patiya Phase-03, Opp. Baba Ramdev Hotel, GIDC Vatva, Ahmedabad-382445, Gujarat.
Contact Person
Kunal Makwana : +91-98988 86853
Chetas Purohit : +91-97274 11134
Email-id info.fayme2015@gmail.com project@faymeengineering.com

Contact Us

Address 20/B, Second Floor, Karnavati Estate, NR.Trikampura Patiya Phase-03, Opp. Baba Ramdev Hotel, GIDC Vatva, Ahmedabad-382445, Gujarat.
Contact Person
Kunal Makwana : +91-98988 86853
Chetas Purohit : +91-97274 11134
Email-id info.fayme2015@gmail.com project@faymeengineering.com

Copyright © 2025 FAYME ENGINEERING PVT LTD  | Powered by: #1 Vinayak InfoSoft- SEO company Ahmedabad – Last Updated: 01-Jan-2025 [VinMna]